Kohlrabi has the scientific name Brassica caulorapa Pasq. or Brassica oleracea var. caulorapa, belonging to the Cruciferae (Brassicaceae) family. The stem enlarges into a swollen above-ground bulb, which contains high nutritional value and is used as a vegetable for food.
1. Varieties and Planting Season
Varieties
There are three main kohlrabi types commonly cultivated, depending on the season and locality:
- Small-stem kohlrabi (egg-type):
Small, round bulbs; small leaf stalks; thin and small leaves. Suitable for intercropping along the edges of cabbage or potato beds.
Time from transplanting to harvest: 35–50 days. - Medium-stem kohlrabi:
Round, larger bulbs with thin skin; leaf stalks and leaves are larger and thicker than the small type.
Time from transplanting to harvest: 65–80 days. - Large-stem kohlrabi (wheel-type):
Large, slightly flattened bulbs with very thick skin; very large and thick leaf stalks and leaves.
Time from transplanting to harvest: 90–100 days.
Planting Seasons
- Early crop:
Sow seeds from July–August, transplant in August–September.
Use heat-tolerant small and medium types such as B40, Winner, Boeing VA.747, OP-Japonica VA.174, Purple French Kohlrabi (Violet VA.159). - Main crop:
Sow from September–October, transplant in October–November.
Use medium and large types such as Winner, Boeing VA.747, OP-Japonica VA.174, Purple French Kohlrabi (Violet VA.159). - Late crop:
Sow in November, transplant in December.
Use medium and large types such as Winner, Boeing VA.747, OP-Japonica VA.174, Purple French Kohlrabi (Violet VA.159).
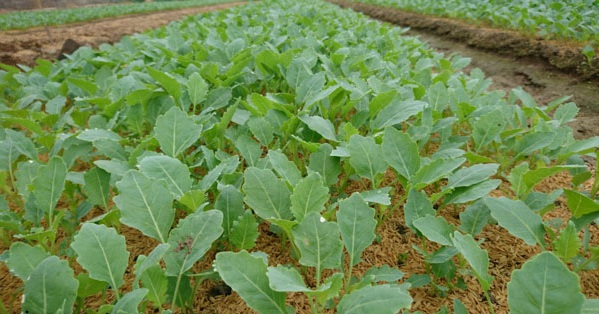
2. Nursery Bed Preparation
Choose high, well-drained land with light loam or sandy loam soil for seed sowing. Prepare the soil thoroughly until fine and рых. Form raised beds 0.3 m high, with furrows 0.3 m wide, and bed width of 0.9–1.0 m. Apply 15–20 tons of well-decomposed manure per hectare as basal fertilizer.
Currently, kohlrabi seeds are expensive. Broadcasting seeds over the entire bed wastes seeds and reduces seedling uniformity. For better efficiency, sow in rows with spacing of 7–10 cm between rows and 5–7 cm between plants.
After sowing, cover the seeds with a thin layer of rice husk or straw and water once daily using a watering can to maintain adequate moisture. When seedlings emerge, remove the straw layer and continue watering regularly to keep the soil moist.
To reduce seedling damage, construct small arches and cover with black netting or plastic film immediately after sowing.
Do not apply nitrogen fertilizer in the nursery stage. Use phosphorus fertilizer or diluted liquid manure for top dressing.
Regularly monitor the nursery. If pests or diseases are detected, use approved pesticides according to regulations. Before uprooting seedlings for transplanting, water adequately to reduce root damage.
If you would like, you can send the remaining sections (land preparation, fertilization, care, pest control, harvesting), and I will translate them into a complete professional technical guide similar to the cabbage section.
3. Land Preparation and Transplanting
Select elevated land with good drainage, preferably light loam soil that has been rotated with non-cruciferous crops. Plow and harrow thoroughly, break up clods, and form raised beds 0.3 m high, with furrows 0.3 m wide, and bed width of 0.8–0.9 m.
Apply basal fertilizer and mix evenly with the soil. Level the bed surface before transplanting.
Plant spacing:
- 30 cm between plants
- 40 cm between rows
- Plant density: 55,000–75,000 plants per hectare
Water once daily to maintain adequate moisture. After plants recover (establish), irrigate every 2–3 days.
4. Fertilization and Application Methods
Fertilizer amount per sào (360 m²):
- 200–300 kg well-composted manure or 100 kg organic bio-fertilizer
- 8–10 kg nitrogen
- 15–20 kg phosphorus
- 9 kg potassium
Application Method
Basal application:
- 200–300 kg composted manure or 100 kg organic bio-fertilizer
- 3 kg nitrogen
- 15–20 kg phosphorus
- 3 kg potassium
Top dressing:
- 1st application (7–10 days after transplanting, when plants recover):
1 kg nitrogen + 2 kg potassium (dissolved in water and applied at the plant base) - 2nd application (15–20 days after transplanting):
2–3 kg urea + 2 kg potassium - 3rd application (25–30 days after transplanting):
2–3 kg urea + 2–3 kg potassium
Stop nitrogen application at least 15 days before harvest.
5. Irrigation and Crop Care
Water once daily to maintain sufficient moisture. After plants are well established, irrigate every 2–3 days. Furrow irrigation may be applied; once adequate moisture is reached, drain excess water immediately.
Irrigation should be combined with inorganic fertilizer top dressing. Loosen the soil and hill up around the base of plants 2–3 times during the growing period. Regularly remove weeds, yellow leaves, and diseased leaves.
6. Pest and Disease Control
Apply integrated pest management (IPM) measures. Regularly inspect fields to detect pests and diseases early and control them promptly.
a) Cutworms
Cause damage at the seedling stage by cutting stems and pulling young shoots to the ground to feed. Commonly occur in light loam and sandy loam soils.
Control measures:
- Field sanitation, remove weeds, and plow soil 2 weeks before planting.
- Apply soil treatment insecticides such as Prevathon granules, Basudin 10H, Diazan, etc., before sowing or transplanting.
- Use sweet-and-sour bait traps (4 parts brown sugar + 4 parts vinegar + 1 part alcohol + 1 part water + 1% insecticide) to trap adults.
b) Diamondback Moth
Damages plants throughout the entire growth period.
Control measures:
- Spray seedlings 1–2 days before transplanting.
- Spray or irrigate in the late afternoon to wash off eggs and larvae and reduce moth mating and egg-laying.
- Use approved plant protection products listed for permitted use.
Ensure a pre-harvest interval of 10–15 days, or follow official agricultural guidelines.
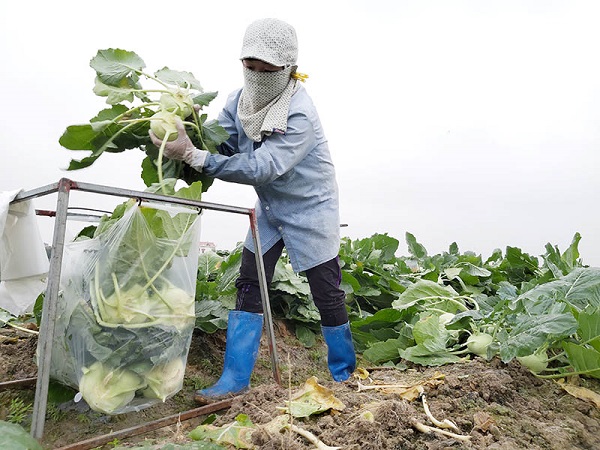
7. Harvesting
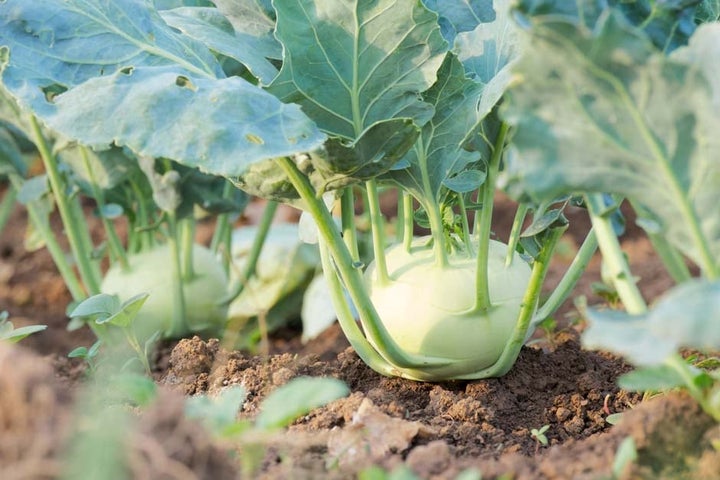
Harvest based on the growth duration of each variety and season. When the bulb surface becomes flat and smooth and the young leaves stop growing, it is the appropriate time to harvest.
Delaying harvest will cause the bulb to become overmature, fibrous, and reduced in quality.